
Quick answer
To clean your dog’s ears safely, use a dog-specific ear cleaner, fill the ear canal without pushing the nozzle inside, massage the base of the ear for 20 to 30 seconds, let your dog shake, and wipe away only the debris you can reach with gauze or a cotton ball. Do not put cotton swabs, hydrogen peroxide, rubbing alcohol, or homemade vinegar mixtures into the canal. If the ear is painful, swollen, bleeding, foul-smelling, or producing thick discharge, stop and call your veterinarian instead of cleaning it at home.
Learning how to clean dog ears safely starts with one useful fact: you are not trying to scrub the canal. The cleaner loosens wax, massage brings it toward the opening, and a head shake does much of the remaining work. Because a dog’s ear canal bends before it reaches the eardrum, poking a cotton swab straight down can push debris in exactly the wrong direction.
Some dogs hardly need their ears cleaned at all. A healthy ear is usually pale pink, comfortable when touched, and free from a strong smell. A little light-colored wax is normal. If you keep washing an ear that is already clean, the skin may stay damp and become irritated. Remove buildup when it appears; do not try to make the canal sterile.
In this guide
Check the Ear Before You Start
Before you open the cleaner, look at both ears in good light. One ear often gives you a useful comparison for the other. Light yellow or amber wax can be normal. Swelling, soreness, or a new odor is not something to wash away and forget.
Dark material is not always dirt. Brown or black debris may accompany yeast or ear mites, while yellow-green discharge, blood, or coffee-ground-like material deserves a veterinary check. Cleaning first can remove material needed for testing. It can also hurt badly if the skin is ulcerated or the eardrum has been damaged.
Skip home cleaning and contact your veterinarian if you notice:
- yelping, pulling away, snapping, or guarding the head when the ear is touched;
- redness, heat, swelling, sores, or a canal opening that looks narrowed;
- a strong, sweet, musty, or foul odor;
- thick, pus-like, bloody, or coffee-ground-like discharge;
- constant scratching or repeated, forceful head shaking;
- a head tilt, loss of balance, circling, unusual eye movements, or facial drooping;
- a balloon-like swelling of the ear flap;
- a suspected grass awn, seed, insect, or other object in the canal.
If you are unsure whether the ear is simply dirty or becoming infected, review this dog ear infection symptoms checklist and arrange an examination when symptoms are present.
What You Need to Clean a Dog’s Ears
- A dog ear cleaner recommended by your veterinarian. A routine cleanser is different from medication used for an infection.
- Gauze pads or soft cotton balls for the opening and visible folds.
- A clean towel. Once your dog shakes, some of the cleaner and wax will end up on it.
- A few good treats, given throughout the process rather than saved until the end.
- A bath mat or rug so your dog is not slipping while you handle the ear.
How to choose an ear cleaner
The rows of ear cleaners in a store can make the choice look simple. It is not. Wax-softening products, post-swim drying products, and medicated cleaners do different jobs. You also cannot identify yeast or bacteria just by looking at the discharge, so a suspected infection is a poor time to experiment.
For ordinary home care, ask your veterinarian which gentle commercial cleaner fits your dog. That advice matters even more after a ruptured eardrum, ear surgery, repeated infections, or episodes of poor balance. A product that is fine in a healthy ear may not be safe when no one has confirmed that the eardrum is intact.
Do not improvise with household liquids
Do not pour hydrogen peroxide, rubbing alcohol, essential oils, or an undiluted homemade vinegar mixture into your dog’s ear. These substances can sting inflamed tissue, disrupt the skin barrier, leave moisture behind, or delay healing. A homemade mixture also has no reliable concentration or safety assessment for a damaged eardrum.
How to Clean Dog Ears: Step-by-Step
Pick a quiet moment, not the five minutes before you need to leave the house. With a first-time dog, spend a few short sessions touching the ear flap, lifting it, and offering a treat. Add the liquid only when that feels routine. If you find yourself wrestling with your dog, stop. Sudden movement is how a simple cleaning turns into a sore ear.
1. Prepare the area and the cleaner
Put everything within reach and set your dog on a surface with some grip. Cold cleaner is unpleasant. Stand the closed bottle in warm water for a few minutes, then test it on the inside of your wrist. It should feel lukewarm, not hot. Never microwave it.
2. Position your dog comfortably
A small dog can sit between your legs with the head facing away from you. Let a larger dog stand or sit at your side. There is no perfect pose; use the one that lets your dog stay relaxed without being pinned down. Give a treat before you lift the ear flap.
3. Lift the ear flap and inspect the opening
Hold the ear flap gently up and a little back. This opens the entrance and eases the bend at the top of the canal. Take one last look. New redness, discharge, swelling, or pain is a reason to put the bottle down.
4. Apply the cleaner without inserting the nozzle
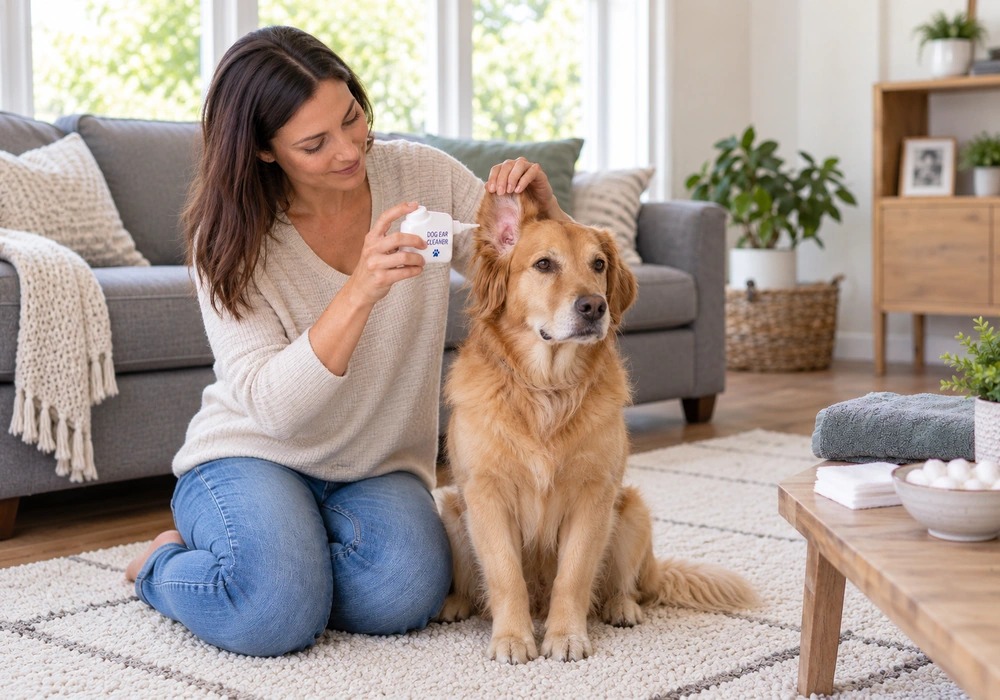
Keep the bottle tip just above the opening. It should not touch the ear or disappear into the canal. Use the amount on the label or the amount your veterinarian showed you. The opening may look small, but the nozzle still belongs outside it. This keeps the bottle clean and avoids pressure inside the ear.
If your dog is frightened by the bottle, ask your veterinarian whether you can saturate a cotton ball with the recommended cleaner, place it at the entrance, and gently squeeze the liquid in. Do not push the cotton ball down the canal.
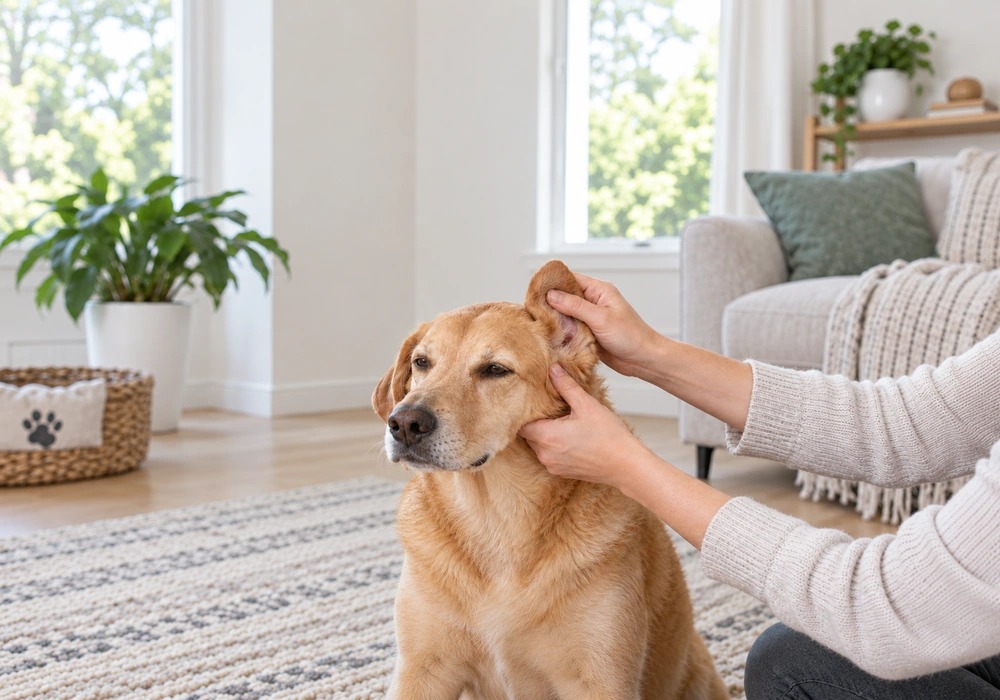
5. Massage the base for 20 to 30 seconds
Keep the flap lifted and place your fingers around the soft base of the ear, close to the side of the head. Massage gently for 20 to 30 seconds. A quiet squishing sound is normal; it means the liquid is moving around the lower canal and loosening wax.
The massage should not hurt. Stop immediately if your dog cries, tries to bite, suddenly loses balance, or shows sharp pain.
6. Let your dog shake
Release the ear and step back. This is usually the messy part. Let your dog shake, because that motion brings loosened wax and fluid toward the outer ear. Keep the towel nearby for the spray.
7. Wipe only what you can see
Wipe the opening and the visible folds with gauze or a cotton ball. Go only as far as a wrapped fingertip reaches easily. If you need to push, you have gone too far. Use a fresh piece of gauze when the first one becomes dirty.
A faint smear of wax is not worth repeated rubbing. Once the visible area looks reasonably clean and dry, give your dog a break and a treat. Clean the second ear only if it needs it.
What to expect afterward
A few shakes or a brief ear rub can happen right after cleaning. Your dog should then settle, and the visible ear should not be dripping. Call your veterinarian if the shaking continues or if you notice redness, pain, a head tilt, or poor balance.
Why cotton swabs cause trouble
A dog’s ear canal drops down and then turns inward before it reaches the eardrum. A straight cotton swab cannot follow that bend. Instead, it tends to pack wax farther in. If the dog jerks its head, the swab can scrape the canal or strike the eardrum.
The ear already has a slow cleaning system of its own. Skin cells move outward from deeper in the canal and carry normal wax with them. Too much liquid, hard rubbing, or harsh chemicals can interrupt that process and leave the skin more vulnerable than it was before.
How Often Should You Clean Your Dog’s Ears?
There is no useful rule such as “clean every dog once a week.” Many dogs need little more than a regular look. Others collect wax or moisture because of floppy ears, dense hair, frequent swimming, or allergies. Let the condition of the ear and your veterinarian’s advice set the schedule, not the calendar alone.
| Dog or situation | Practical approach | What to monitor |
| Healthy ears with little wax | Inspect regularly and clean only when visible buildup appears | Color, odor, comfort, and new debris |
| Floppy or heavily haired ears | Check more often; some dogs may need cleaning every 2 to 4 weeks if wax accumulates | Humidity, wax buildup, redness, and odor |
| Dogs that swim frequently | Dry the visible outer ear after swimming; use a veterinary drying product only if recommended | Trapped moisture and irritation after water exposure |
| Allergies or recurrent ear disease | Follow an individualized veterinary schedule rather than a generic routine | Early recurrence, medication response, and cytology results |
If clean gauze repeatedly comes away with substantial debris, or the ear looks dirty again within a few days, do not simply increase the cleaning frequency. Rapid wax return may indicate inflammation, allergy, yeast, bacteria, parasites, or a foreign object.
Mistakes that make ears worse
Putting cotton swabs into the canal
Cotton swabs can push wax into the horizontal canal and may scratch the skin or puncture the eardrum. They are suitable only for the superficial creases of the outer ear when you can clearly see the tip.
Cleaning a painful or infected-looking ear
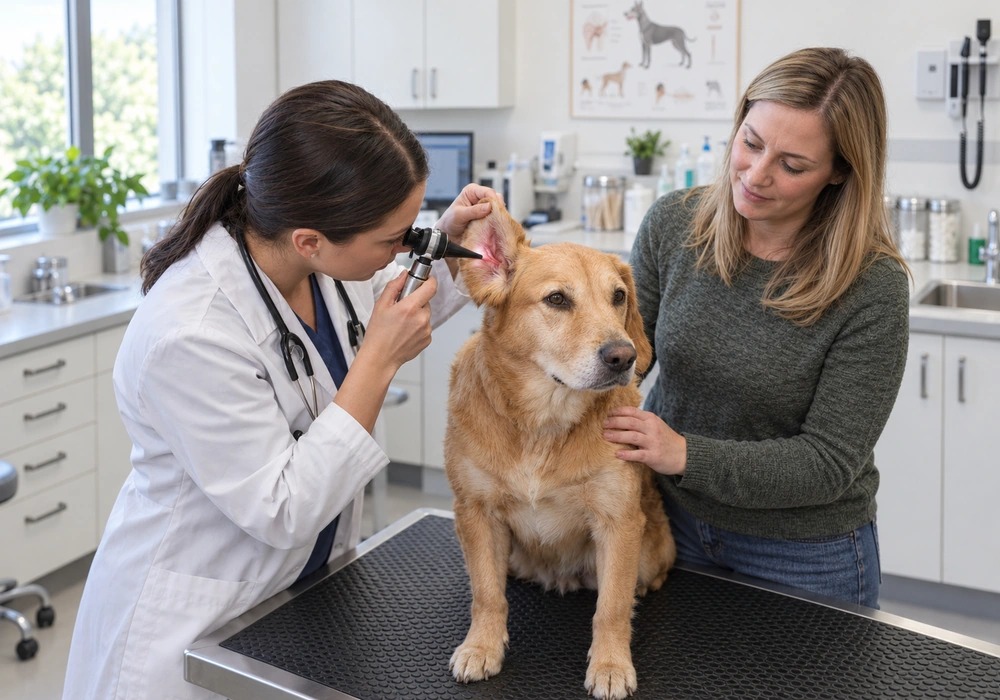
Home cleaning is not a substitute for an otoscopic examination and ear cytology. A veterinarian may need to determine whether the eardrum is intact, identify the organisms present, remove a foreign body, or select medication that will remain effective in the discharge.
Using force or creating pressure
Do not seal the bottle nozzle inside the opening or squeeze fluid under pressure. The tip should hover above the canal. Likewise, never use a syringe to flush deeply unless a veterinarian has specifically trained you to perform a prescribed home protocol.
Guessing at the cleaner
A wax-softening cleaner is not automatically suitable for a wet, ulcerated, or pus-filled ear. Leave medicated and antimicrobial products to a veterinarian-directed plan, especially when the eardrum cannot be seen.
Over-cleaning
Daily or unnecessarily frequent cleaning can keep the skin wet, strip protective oils, create tiny surface injuries, and trigger more wax production. If your dog seems to need constant cleaning, the underlying cause needs attention.
Plucking ear hair without a reason
Hair can trap moisture and wax in some dogs, but routine plucking may also cause irritation and inflammation. Ask your veterinarian or an experienced groomer whether trimming, limited removal, or leaving the hair alone is best for your dog’s ears.
When the job belongs to a veterinarian
A clinical ear flush is not a stronger version of the home routine. A painful or blocked ear may require sedation so the veterinarian can see the eardrum, collect a sample, and remove material without a struggling dog getting hurt. Deep flushing at home can drive debris inward and send the wrong liquid past a damaged eardrum.
Seek prompt veterinary care for severe pain, blood, pus, sudden hearing changes, facial weakness, head tilt, abnormal eye movements, stumbling, or loss of balance. These signs may indicate damage beyond the outer canal and should not be managed by adding more cleaner.
Frequently Asked Questions
Can I clean my dog’s ears with water?
Plain water can sit in the canal and does a poor job of dissolving oily wax. Use a canine cleaner recommended for your dog. Veterinarians sometimes use sterile saline in specific situations, but tap water is not the same thing.
Can I use hydrogen peroxide in my dog’s ears?
No. The fizz looks busy, but it does not mean the ear is getting cleaner. Hydrogen peroxide can irritate inflamed tissue, interfere with healing, and leave moisture behind.
Can I use vinegar to clean my dog’s ears?
Do not use an undiluted or homemade vinegar solution. Veterinary ear products may contain carefully formulated acids, but kitchen mixtures have inconsistent concentrations and can cause significant stinging in an inflamed or ulcerated ear.
How do I know whether my dog’s ears are dirty or infected?
A small amount of wax without pain or odor is often normal. Redness, soreness, a strong smell, and unusual discharge point to a problem, but they do not reveal the cause. Your veterinarian may need an otoscope and a sample examined under a microscope to sort out yeast, bacteria, mites, or a foreign body.
Why does my dog keep shaking after I clean the ears?
A few shakes immediately after the liquid is applied are expected. Continued shaking, scratching, crying, head tilt, or imbalance is not. The ear may be inflamed, the product may be irritating, or liquid and debris may remain trapped. Stop further cleaning and contact your veterinarian.
Should I clean my dog’s ears before applying prescribed medication?
Follow the timing your veterinarian gives you. Cleaning can help medication contact the canal lining, but some products need a waiting period after cleaning, and excessive flushing may remove medication. The correct order depends on the cleaner, treatment, eardrum status, and type of infection.
Do floppy-eared dogs always need weekly cleaning?
No. Floppy ears can retain more heat and moisture, but individual dogs differ. Check the ears regularly and base cleaning on visible buildup and veterinary advice. A healthy, odor-free ear should not be cleaned merely because a calendar says it is time.
A safer routine is a simple one
Use the right canine cleaner and keep the bottle tip outside the canal. Massage gently, let your dog shake, then wipe away what comes out. That is enough. A clean-looking ear does not need more scrubbing, and a painful or foul-smelling ear needs an examination rather than another bottle of cleaner.
It helps to know your dog’s normal: the usual amount of wax, the color of the skin, and whether either ear tends to collect moisture. Changes are easier to spot when you have something real to compare them with.
References
- Cornell University Riney Canine Health Center. How to Clean Your Dog’s Ears.
- Today’s Veterinary Practice. Clinical Resource: Deep Ear Flush, Step by Step.
- Virbac Animal Health. Cleaning Your Dog’s Ears.
Related Articles
7 Fun Games for Dog Mental Stimulation
Mental stimulation for dogs is play and problem-solving that works the brain instead of just the legs: scent games, puzzle toys, hidden treats, new tricks. A physically tired dog can
Why Is My Dog’s Tongue Grey?
Canine oral health and emergency triage Why Is My Dog's Tongue Grey? A grey tongue in dogs does not always mean the same thing. Some dogs are born with dark
How to Identify Canine Hormone Imbalance Symptoms
Canine endocrine health How to Identify Canine Hormone Imbalance Symptoms Hormones influence a dog's metabolism, appetite, thirst, skin, coat, muscles, stress response, blood sugar, and reproductive cycle. Most endocrine disorders